Advertisement
The Art of Bread Baking: A Journey Through Tradition, Technique, and Taste
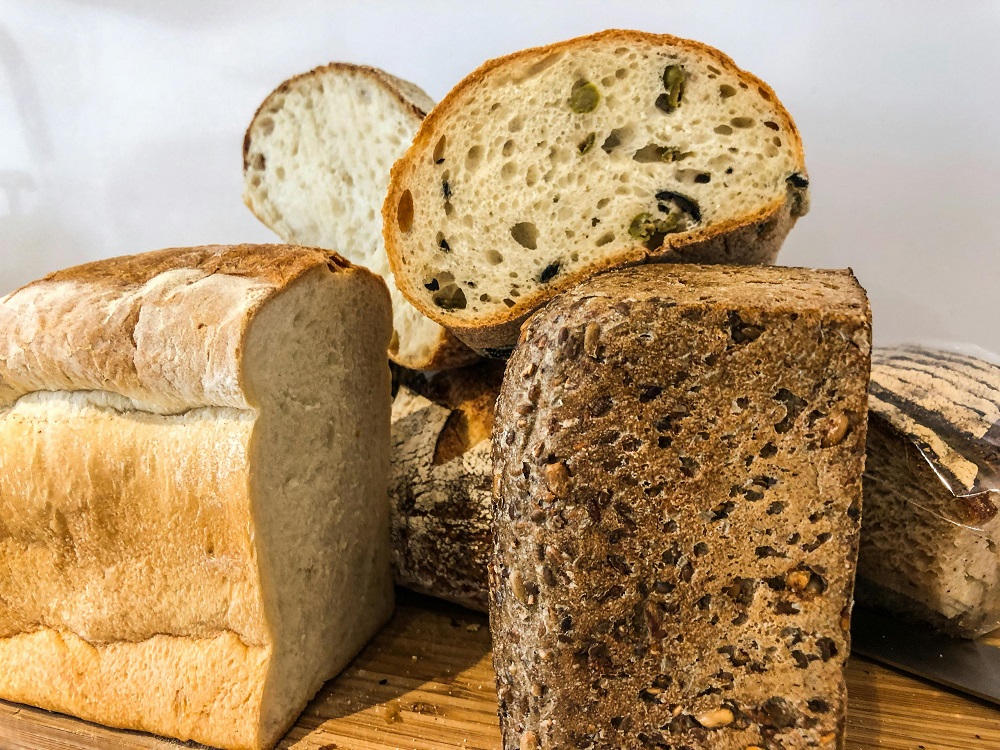
Bread baking is an ancient craft, a time-honored tradition that has been passed down through generations and across cultures. From the rustic loaves baked in the simplest of kitchens to the artisanal masterpieces crafted by skilled bakers, bread holds a special place in our culinary heritage. It is one of the oldest prepared foods, and its significance in human history is profound.
At its core, bread is a humble combination of flour, water, yeast, and salt, yet the process of transforming these basic ingredients into a nourishing loaf is a complex and rewarding endeavor. The art of bread baking requires not only a knowledge of technique but also a deep understanding of the ingredients and the patience to let nature take its course. It's a craft that engages all the senses, from the feel of dough under your hands to the intoxicating aroma that fills the kitchen as the bread bakes.
The History and Cultural Significance of Bread
Bread has been a staple food for thousands of years, with evidence of early bread-making dating back to around 10,000 B.C. in ancient Egypt. The process of grinding grains into flour, mixing it with water, and baking it into bread was a revolutionary development that allowed for the storage of food and supported the growth of civilizations. In many cultures, bread has symbolic meanings, often associated with life, sustenance, and community.
In ancient Egypt, bread was so integral to daily life that it was used as a form of currency. The Romans, who perfected the art of bread baking, built public bakeries and spread their techniques throughout their empire. In the Middle Ages, bread was central to the European diet, and the rise of guilds ensured that the knowledge and skills of bread-making were preserved and passed on.
Bread continues to hold cultural and religious significance today. For example, in Christianity, bread is used in the sacrament of the Eucharist, symbolizing the body of Christ. In Jewish tradition, challah bread is braided and served on the Sabbath and during holidays, symbolizing the manna that fell from heaven during the Exodus. Around the world, different types of bread are celebrated and cherished as part of cultural identities, from the flatbreads of the Middle East to the hearty rye breads of Eastern Europe.
The Science of Bread Baking
While bread baking is an art, it is also deeply rooted in science. Understanding the chemical reactions that occur during the baking process is essential to achieving the perfect loaf. The key to bread's texture and flavor lies in the fermentation process, where yeast consumes the sugars in the flour and produces carbon dioxide and alcohol. This fermentation process is what causes the dough to rise and develop its characteristic flavor.
The type of flour used in bread baking is critical, as different flours contain varying amounts of gluten, the protein that gives bread its structure. High-gluten flours, like bread flour, create a chewy, elastic dough that can trap air bubbles, resulting in a light and airy loaf. Whole wheat and rye flours, on the other hand, have less gluten and produce denser, more robust breads.
Temperature and time are also crucial factors in bread baking. The dough must be kneaded to develop the gluten, and then allowed to rise in a warm environment until it doubles in size. This first rise, known as the "bulk fermentation," is followed by shaping the dough and allowing it to rise again before baking. The baking process itself involves a series of chemical reactions, including the Maillard reaction, which gives bread its golden-brown crust and complex flavor.
Tools and Ingredients for Bread Baking
To start baking bread at home, you don’t need a lot of specialized equipment, but having the right tools can make the process easier and more enjoyable. Here’s a list of basic tools and ingredients you’ll need to get started:
Essential Tools:
- Mixing Bowls: Large bowls are needed to mix and knead the dough.
- Digital Scale: Precision is key in baking, and a digital scale ensures accurate measurements of ingredients.
- Bench Scraper: Useful for dividing dough and cleaning work surfaces.
- Proofing Basket (Banneton): These baskets help shape and support the dough during the final rise.
- Dough Whisk: A dough whisk is great for mixing heavy, sticky doughs.
- Dutch Oven or Baking Stone: For baking bread, a Dutch oven or baking stone helps create a crisp crust by trapping steam inside.
- Lame (Bread Scoring Tool): Used to score the dough before baking, which allows the bread to expand properly in the oven.
- Oven Thermometer: Ensures your oven is at the correct temperature for baking.
Key Ingredients:
- Flour: Bread flour is preferred for its high gluten content, but all-purpose flour can also be used. Experimenting with whole wheat, rye, and other specialty flours can add variety to your bread.
- Yeast: Active dry yeast and instant yeast are the most common types used in home baking. Sourdough starters, which use wild yeast, can also be used to leaven bread.
- Water: The quality of water can affect the taste of the bread. Filtered water is ideal.
- Salt: Adds flavor and strengthens the gluten structure.
- Sugar or Honey (Optional): These can be added for flavor and to feed the yeast, speeding up fermentation.
- Fat (Optional): Ingredients like butter, oil, or milk can be added to enrich the dough, resulting in a softer crumb.
Techniques of Bread Baking
The process of bread baking can be broken down into several key steps, each requiring attention to detail and patience. Here’s a detailed overview of the essential techniques involved:
1. Mixing and Kneading:
The first step in bread baking is to mix the ingredients to form a dough. This can be done by hand or with a stand mixer. The goal is to hydrate the flour and begin developing the gluten. Kneading is the process of working the dough to further develop the gluten, which gives the bread its structure. Kneading can be done by hand on a lightly floured surface or with the dough hook attachment of a stand mixer. The dough should become smooth, elastic, and slightly tacky.
2. Bulk Fermentation:
After kneading, the dough is left to rise during the bulk fermentation phase. This is when the yeast ferments the sugars in the flour, producing carbon dioxide gas that causes the dough to expand. The dough should be left in a warm, draft-free area until it has doubled in size, which usually takes about 1-2 hours, depending on the room temperature and the yeast's activity.
3. Shaping:
Once the dough has completed its first rise, it is ready to be shaped. Shaping involves deflating the dough gently and forming it into the desired shape, whether it’s a round boule, a long baguette, or a loaf for a bread pan. Proper shaping is important for achieving the right texture and appearance. For example, shaping involves creating surface tension on the outer layer of the dough, which helps the bread maintain its shape during the final rise and baking.
4. Proofing:
After shaping, the dough undergoes a second rise, known as proofing. This is when the dough is placed in a proofing basket or directly on a baking sheet or in a loaf pan. Proofing times vary but typically range from 30 minutes to 2 hours. During proofing, the dough should rise until it has puffed up significantly but not overproofed, as this can cause it to collapse during baking.
5. Scoring:
Before baking, the dough is often scored with a sharp blade (a lame) to allow it to expand properly in the oven. Scoring creates controlled openings in the dough, which prevent it from bursting unpredictably. The patterns can be simple slashes or more intricate designs, adding an artistic touch to the finished loaf.
6. Baking:
Baking is the final step, where the dough transforms into bread. For the best results, the oven should be preheated to the correct temperature. Many bakers use a Dutch oven or baking stone to create a hot, humid environment that encourages a crisp crust and good oven spring. The baking time varies depending on the size and type of bread, but it generally ranges from 20 to 45 minutes. The bread is done when it has a deep golden-brown color and sounds hollow when tapped on the bottom.
7. Cooling:
Once the bread is baked, it should be allowed to cool completely on a wire rack before slicing. Cooling allows the crumb to set and the flavors to fully develop. Cutting into hot bread can result in a gummy texture, so patience is key.
Tips for Successful Bread Baking
- Measure Accurately: Baking is a science, and accurate measurements are crucial. Use a digital scale for precise ingredient quantities.
- Control the Temperature: Yeast is sensitive to temperature. Ensure that your water is warm but not too hot, and maintain a consistent temperature during fermentation.
- Practice Patience: Bread baking requires time, especially during fermentation and proofing. Don’t rush the process—good things take time.
- Experiment with Flavors: Once you’re comfortable with the basics, try adding ingredients like herbs, seeds, or dried fruit to create unique flavors and textures.
- Learn from Experience: Every batch of bread is a learning experience. Keep notes on what works and what doesn’t, and don’t be afraid to adjust techniques and recipes.
The Joy of Baking Bread at Home
There’s something profoundly satisfying about baking your own bread. The process connects you to a tradition that spans millennia, yet offers endless opportunities for creativity and personalization. Whether you’re baking a simple loaf for everyday meals or crafting an elaborate artisanal bread for a special occasion, the act of bread baking brings a sense of accomplishment and joy.
In a world where convenience often takes precedence over craft, taking the time to bake bread is a reminder of the beauty in simplicity. It’s a way to slow down, engage with your food on a deeper level, and create something truly special with your own hands.
Conclusion
Bread baking is more than just a culinary skill; it's an art form that requires patience, practice, and a deep appreciation for the ingredients and processes involved. From understanding the science behind fermentation to mastering the techniques of kneading and shaping, every step in the bread-making journey contributes to the final product—a delicious, nourishing loaf that carries with it the flavors of tradition and the warmth of home.
Whether you’re new to bread baking or a seasoned baker, there’s always something new to learn and explore in the world of bread. So, roll up your sleeves, dust off your apron, and dive into the rewarding practice of baking your own bread. The result is not just a loaf of bread, but a tangible connection to history, culture, and the simple joys of life.

Advertisement


About author

Ayesha Angela
Angelina Costa was born on June 15, 1985, in Lisbon, Portugal. Growing up in a culturally rich environment, she developed a passion for literature at an early age. Her parents, both artists, encouraged her creativity, and she spent much of her childhood writing stories, poems and articles.
You may also like


Trending Videos